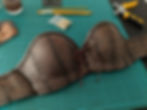
When making my barbarian cosplay I came across an issue - the breastplate was made from leather. I wasn't very confident in working with leather so I decided to make it from EVA foam. I want to show you how I achieved that perfect finish with foam and acrylic paints.

Materials and tools I used:
•Heat gun
•2mm EVA foam
•Acrylic paints
•Primer
•Tin foil (preferably thick)
•Brushes
• Needle and dark thread
•(makeup) sponge
•Fabric (I used bra as a base for the breastplate)

I took a strip of EVA foam and cut it up into squares. As a base for this cuff I used a piece of fabric (preferably not very stretchy). For the breastplate I used a bra. It was the easiest way to make sure the breastplate has the right shape.
Then I glued the foam onto the fabric. I only put glue on the centre of foam squares and made sure they were perfectly aligned once attached to the fabric base.

I stitched the foam panels together – you can use whatever stitch you want – I used one that looks like X. Sew through both foam and fabric so it’s better attached to the base.
I used normal sewing thread, if you’re making a bigger piece of armour I recommend using thicker thread so the stitches are more noticeable. Also make sure the stitches are not too tight otherwise they can rip the foam.

The last step is to take some tin foil, heat up the EVA foam and press the foil against it. It will leave nice texture. You don't have to use tin foil, it was the most convenient option for me.
1. I started with the layer or primer or black paint.
2. I mixed “burnt umber” and “burnt sienna” acrylic paint in 1:1 ratio and applied it with damp sponge. (Remember if you use dry sponge it will soak up all the paint)
3. I added a bit of white paint to the sienna/umber mix to make it a bit lighter. Then I applied it with a sponge making sure I leave the edges darker.
4. I added some more white to the brown mix and highlighted the edges using a brush.
Remember – it’s okay if there are patches and the paint job is not even. It makes it look better!
Here are some progress photos of the leather breastplate. After I stitched the foam panels together, I have heated them up and shaped them to look more natural.


If you decided to use this foam cosplay tutorial in your projects, tag me in your photos on social media :) You can find me on Instagram and Facebook (and sometimes Twitter)
Happy crafting!


